All tutorialsTemplates Tutorial

How to generate 3 AI product shots from one clothing photo

Use Milano AI Templates to create front, back, and close-up ecommerce images without writing a prompt from scratch.

Now on YouTube

Watch the Templates tutorial

Watch how to browse Milano AI Templates, choose 3 Angles, upload one clothing photo, choose image size and WebP, then generate a complete ecommerce image set.

Now on YouTube

What you will learn in this tutorial

Milano AI Templates are built for repeatable fashion workflows. Instead of describing every shot manually, you start from a ready-made template that already knows the type of output you want.

In this tutorial, we use the 3 Angles template to create a front shot, back shot, and close-up detail image from one clothing reference. It is a fast way to build ecommerce product imagery for store pages, catalogs, product grids, and collection launches.

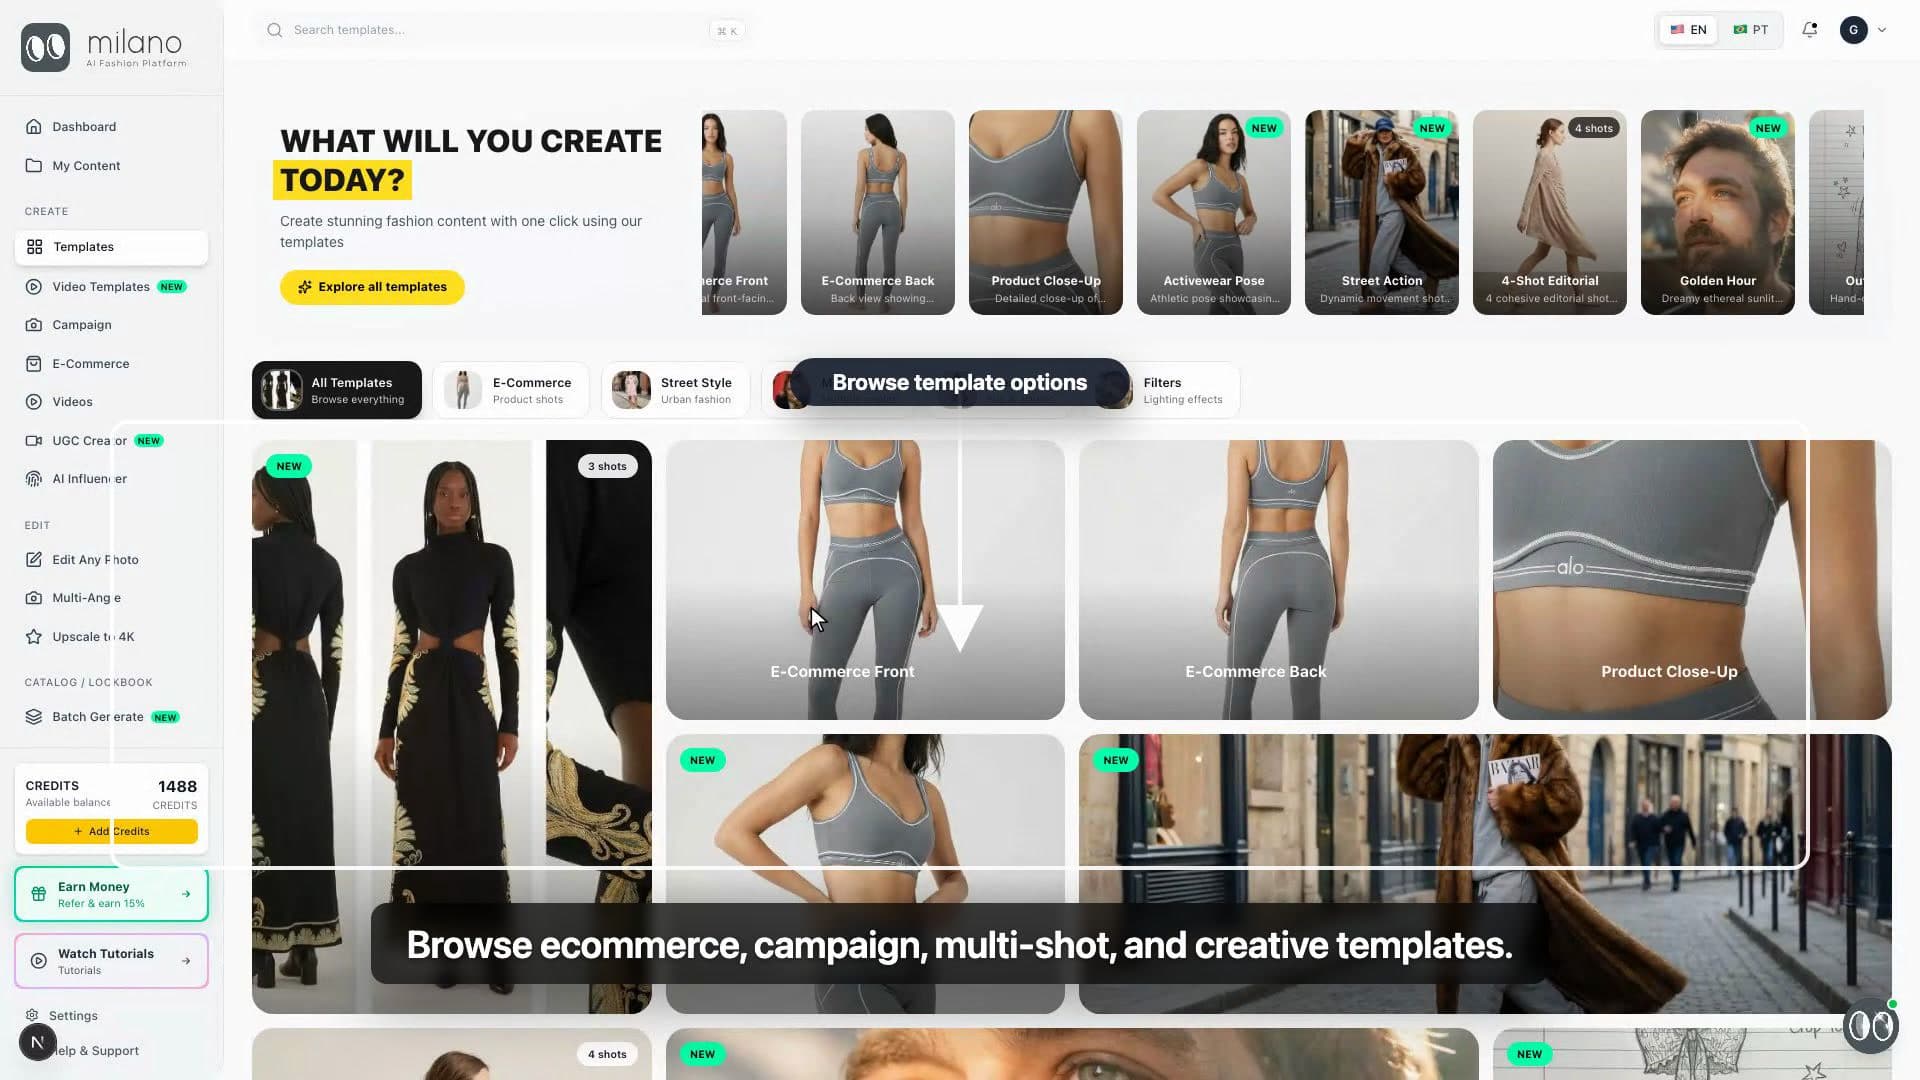
Browse the template library

Start on the Templates page and scan the available workflows. The library includes ecommerce, campaign, multi-shot, street style, creative, and lighting templates, so you can choose the result structure before uploading a product.

  • Use templates when you already know the type of image set you need.
  • Pick ecommerce templates for storefront images, collection pages, and product detail pages.
  • Pick campaign or creative templates when you want more editorial or lifestyle visuals.
Close-up of the Milano AI Templates page showing different template options
Close-up: browse ready-made ecommerce, campaign, multi-shot, and creative templates.

Choose 3 Angles and upload one product photo

The 3 Angles template is designed for ecommerce coverage. Upload one dress or clothing image and Milano AI uses it as the reference for the front, back, and detail shots.

  • Use a clear product photo where the color, pattern, fabric, and silhouette are easy to read.
  • For garments, a worn or mannequin reference often helps with fit and proportion.
  • If details matter, choose a source image that clearly shows the print, straps, buttons, hardware, or fabric texture.
Close-up of the 3 Angles template upload and format controls
Close-up: upload one product image, then choose the product image shape and file format.

Choose image size, WebP, and generate

After the product is uploaded, choose the image shape and file format. In the tutorial we use 4:5 for product-page framing and WebP for a sharp image with a smaller website file size.

  • 4:5 gives the product more vertical space and works well for fashion product pages.
  • WebP is useful for ecommerce because it keeps images sharp while reducing file size.
  • The template handles the shot direction, so the workflow stays fast and repeatable.
Close-up of the 3 Angles generate button and WebP selection
Close-up: generate a complete ecommerce set without writing a prompt from scratch.

Review the front, back, and close-up results

Once the generation finishes, review all three outputs together. Check product accuracy first: print placement, fabric, garment length, seams, straps, and overall shape should still match the original product.

  • Use the front image for product pages and catalog previews.
  • Use the back image to show garment construction and fit from behind.
  • Use the close-up image for material, print, and detail-focused product storytelling.
Close-up of the generated front, back, and close-up product shots
Close-up: the final result includes front, back, and close-up product images.

Best practices for template-based product shots

Start with the right template

The template decides the output structure. Use 3 Angles when you need a product set, not just one hero image.

Use one clear product reference

A clean product photo gives the template better information about color, shape, pattern, and fabric details.

Check every result as a set

Front, back, and close-up images should feel like they belong to the same product page and the same store collection.

Export for your website

Use WebP when you want a sharp product image with a smaller file size for faster ecommerce pages.

Template use cases you can copy

Templates reduce prompt writing, but these notes help you decide when to use each ecommerce output.

Product detail page set

Use 3 Angles when a product page needs front, back, and detail coverage from one clothing reference.

Collection launch assets

Use the same template, aspect ratio, and format across multiple items so the collection feels consistent.

Website performance export

Choose WebP for ecommerce images when you want sharp visuals with smaller files for faster store pages.

Why AI product photo templates matter for ecommerce

Fashion stores need consistent product imagery across pages, grids, catalogs, and campaigns. Milano AI Templates make repeatable ecommerce image sets faster by turning one product reference into structured outputs, so teams can create front, back, and detail shots without writing a custom prompt every time.

Templates FAQ

What does the 3 Angles template create?

It creates three ecommerce product images: a front shot, a back shot, and a close-up detail shot.

Do I need to write a prompt?

No. The template already contains the shot direction, so you only need to upload the product and choose the image options.

What kind of image should I upload?

Upload a clear clothing photo where the garment color, pattern, fabric, shape, and important details are easy to see.

Why choose WebP?

WebP keeps ecommerce images sharp while creating smaller files, which can help product pages load faster.

Templates Tutorial

Create 3 product shots from one clothing photo

Open Templates, choose 3 Angles, upload your product, pick your image size and format, then generate a complete ecommerce product set.

Generate 3 AI Product Shots from One Clothing Photo
1 min

Related tutorials